Data.Page Desktop Edition - Documentation
This is a general overview of the main functionality of the Data.Page Desktop Edition software.Standard JSON conversions
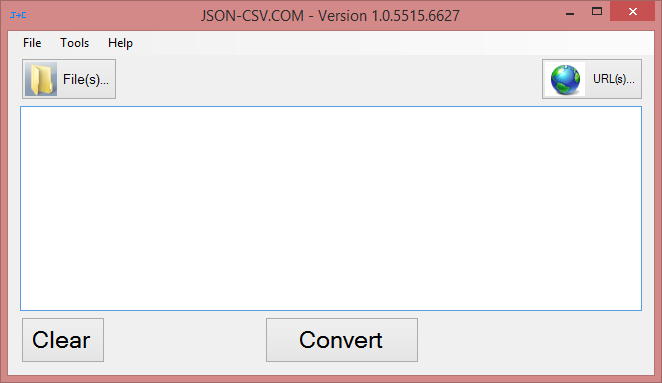
From the main screen you may paste ordinary JSON text into the text box or select one (or more) files by clicking on the "File(s)" button. The conversion will then be generated as per the options specified in the settings screen.
URLs screen
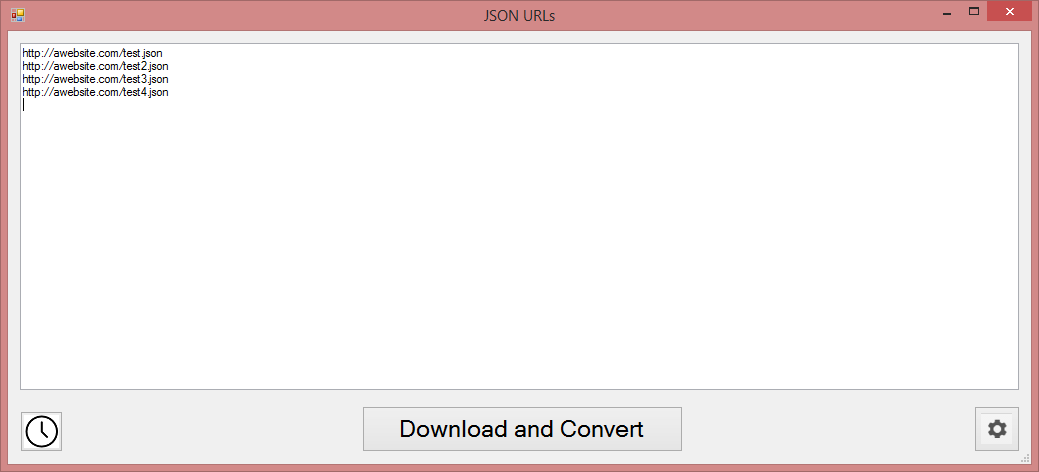
Use this screen to automate requests to one of more JSON URLs. The program will first pull down the JSON data from the URL and then convert the JSON to a CSV file. If you wish to combine multiple URLs into the same file, you can configure this in the [settings-paths-screen]. A special date parameter can be entered as part of the URL. {date,[date format],[days to add]} For example {date,yyyyMMdd,-3} would display the date 3 days earlier than the current date in yyyyMMdd format. This may be useful when polling API data periodically if a date parameter is required. We can also add other similar parameters if we can make things easier for you. Just let us know.
URLs screen with timer
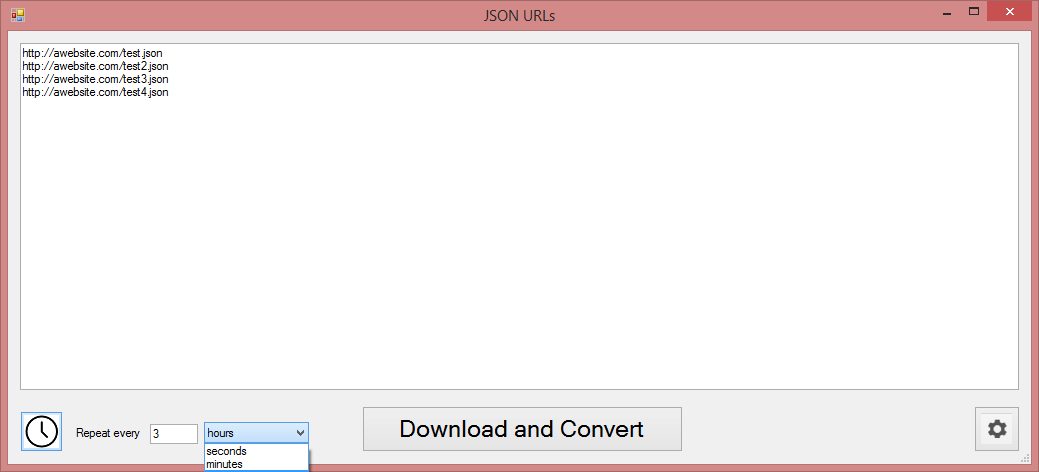
You may configure the engine to repeat the conversion of the entered list of URLs indefinitely for every specified period of time. This allows the software to behave like a timer. This may may be set in hours, seconds or minutes. It can be useful for requirements such as API logging.
Settings - filter
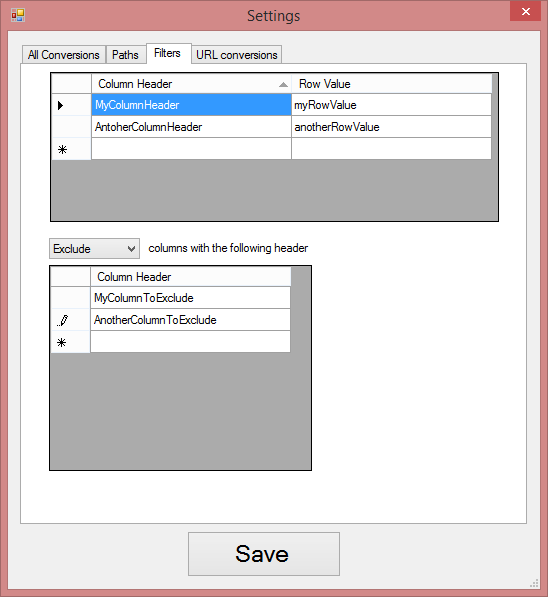
This tab specifies which data should be included in the output CSV file. The first grid allows you to specify certain row values within a column. Only data matching these settings will be written to the CSV file. The second grid allows you to include (or exclude) all columns (and data below) which match the column header names in the list.
Settings - general conversions
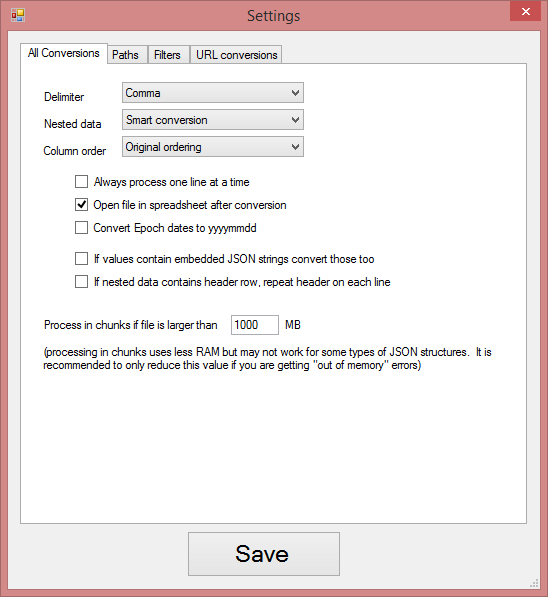
- Delimiter - The delimeter to be used to separate the data elements in the output CSV file.
- Nested data - Specifies how nested data is handled. Smart conversion is a special technique where the engine attempts to display nested data in a way which is more readable. This generally involves techniques such as wrapping certain types of data down rows rather than across columns. Alternatively, you may choose "all on same row" to disallow nested data from being wrapped down.
- Column order - Specifies how columns will be ordered. If "smart ordering" is selected, the engine will re-order the columns attempting to display what it interprets as the more important columns first.
Settings - paths
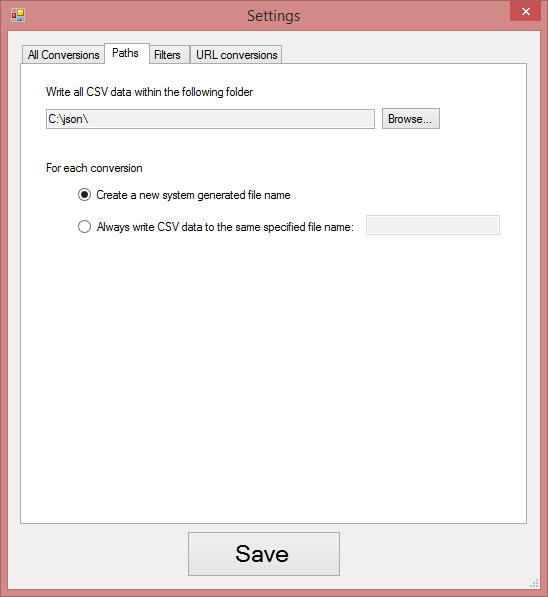
Here you may specify the folder where all CSV output files will be created. By default a new auto-generated file name will be created. However, you may also force all conversions to be written to the same file name. This is useful for logging JSON data sources. It is also useful when converting similar JSON feeds from different URLs within the [URL screen].
Settings - saving CSV output to the same filename
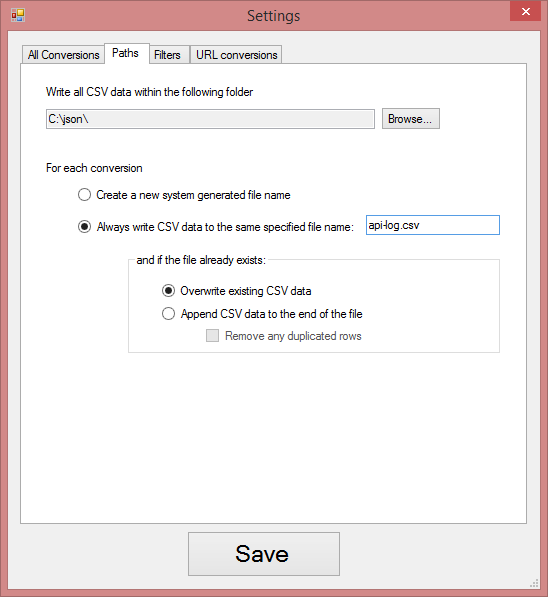
If a file name is specified above, you will also be presented with extra options specifying what to do if the file already exists. If "overwrite existing CSV data" is specified, the existing CSV file will first be deleted. Choose "Append CSV data to the end of the file" if you wish for all CSV data to be retained and stored within the specified file name. If CSV data is appended, you can also choose to "Remove any duplicated rows". This prevents any duplicated data from being stored in the output CSV file. This can be useful for API logging for example so that only the delta (changes) of the API data is retained.
Settings - sending output to a Google Sheet
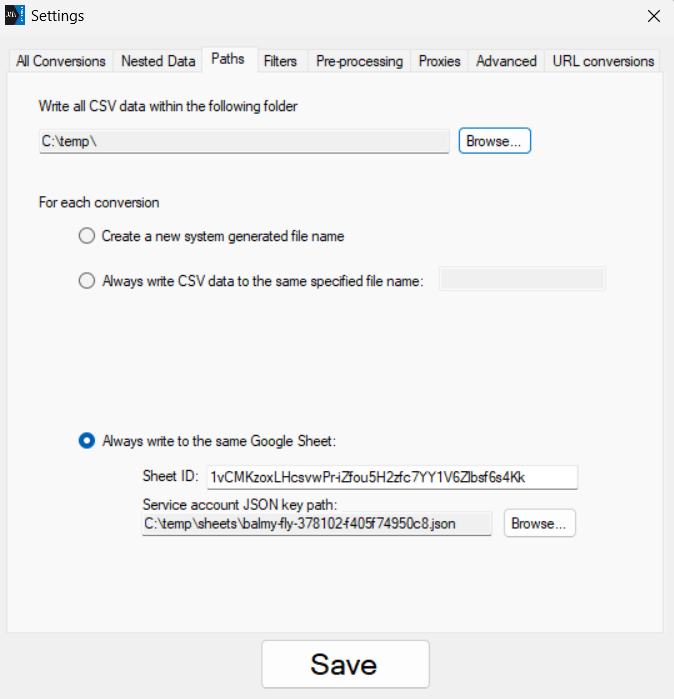
To configure Google Sheets output, choose "Always write to the same Google Sheet".
To set this up, you must generate a "JSON key file" from your Google Account:
- Go to your Google Cloud Dashboard (Google Sheets API) and click "Enable"
- Click the "Credentials" menu on the left-side menu bar
- Click "Manage Service Accounts"
- Click "+ Create Service Account"
- Enter an account name and click "Continue"
- Click "Done"
- Copy the "service account email address" you created (you will need that later)
- Click the 3 dots under the "Action" heading and choose "Manage keys"
- Click "Add key" and choose "Create new key"
- Leave JSON selected (default option) and click "Create" (the JSON key file will download to your machine)
- Create a new Google Sheet in your Google Drive account
- Rename the sheet to "Transformed by Data.Page"
- Click the "Share" button
- Paste the "service account email address" into the text box, untick "notify people" and click "share"
- Copy the ID from the URL. e.g. https://docs.google.com/spreadsheets/d/141F6Q28vz-LbKpN0ftaB0fM6Q-eWSsVc8uUlWk-QpYQ/edit#gid=0
- Open the Data.Page Desktop App
- Go to Settings, "Paths" tab and select "Always write to the same Google Sheet"
- Paste the sheet ID
- Click the "Service account JSON key path" Browse button and select the JSON file you downloaded earlier
- Press the Save button
- Convert a JSON / XML file or URL and it will now be sent to your Google Sheet
- Contact Data.Page support if you require further assistance with this
Settings - URL settings

This screen contains settings specific to the URL conversion screen. If the website you are wishing to extract from requires credentials such as username and password, they can be specified here. If more than one URL is included in the list to convert, you can specify the number of seconds the engine should wait between each request to your URLs.
Deleting unwanted columns
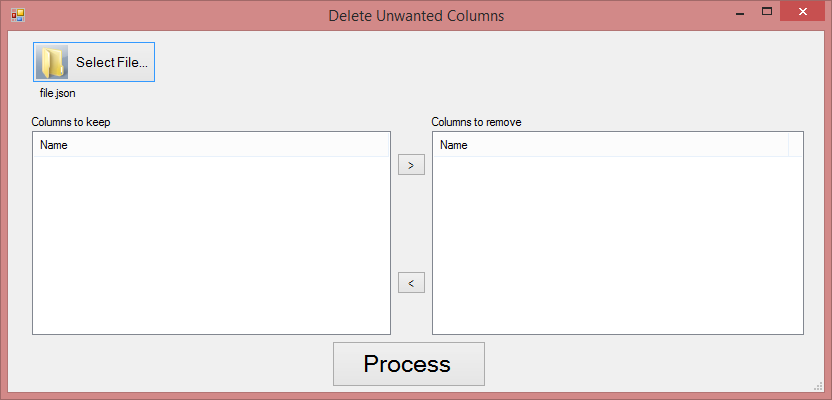
Sometimes a JSON conversion generated through the website or desktop software may contain extra unnecessary columns. This utility allows existing CSV files to be "cleaned up" by removing specified columns.
Command line usage (Windows)
To automate your conversions, you may use the following command line syntax:
datapage.exe input.json output.csv
This will produce a new file called output.csv in the same directory as the exe. You may also provide a full path to the output file:
datapage.exe c:\somepath\input.json c:\anotherpath\output.csv
If you wish to convert a URL:
datapage.exe http://your-url.com/filename.json output.csv
Typically, you would save these commands to a batch file which could be launched by Windows Task Scheduler or another event.
By default command line conversions uses the same settings which you configured in the GUI (in File-Settings). If you wish to use bespoke settings dynamically, go to File-Settings, export your settings profile and then use the following syntax:
datapage.exe http://your-url.com/filename.json output.csv /settings=yourcustomsettings.json
Command Line Usage (Linux)
Same syntax as Windows but replace datapage.exe with:
mono datapage.exe
Command Line Usage (Mac OSX)
Same syntax as Windows but replace datapage.exe with:
mono JsonToCSV.app/Contents/MonoBundle/datapage.exe
Other features
If you would like another feature, just ask us and we will try our best to find a solution for you.
Questions
If you have any questions please contact us.